Suppose a creator needs a product photo for an Instagram post before lunch. The image is usable, but the lighting feels flat and the framing is slightly off. If the composition already works and the main issue is a modest overall adjustment, start with Quick Photo Fix. If the image needs a deliberate crop or straightening, choose AI Photo Studio. That is the practical difference behind quick photo fixes versus studio controls: choose the workspace with the controls your photo needs. [1][2]
Neither route is automatically better. The right choice depends on the image, the deadline, and how much visual consistency the final asset needs.
Before you start: A free local browser preview is not the final processed image. Creating an enhanced result uses paid processing credits. Quick Photo Fix and AI Photo Studio have separate balances, so check the account, settings, and cost in the workspace you are using. After processing, compare the completed result with your original before downloading or sharing it. [3][4]
Quick photo fixes versus studio controls: the real choice
Quick fixes are for clear, contained problems. A photo may look a little dark, need a restrained color adjustment, or look less polished than the rest of a carousel. In those cases, a short workflow keeps the task focused. Make a purposeful adjustment, review the setup, and judge the completed output before moving on to the caption or campaign layout.
Both workspaces offer presets for enhancement, deblurring, cleanup, and upscaling. In the signed-in workspaces checked for this guide, the default preset is labeled Natural Pop, alongside Deblur, Clean Up, and Upscale. Quick Photo Fix also includes enhancement strength, brightness, contrast, color richness, and warmth. Its social output targets resize the image to fit without forcing a crop. Studio adds more detailed framing, adjustment, and review controls. [1][2]
Studio controls make more sense when the brief already calls for those controls or a first result reveals a specific issue. Perhaps a product photo needs to match an existing set of brand images. Perhaps the crop changes what the viewer notices. Or perhaps the same image will appear in an ad, a landing page, and a sales deck, where tone and composition need a closer review.
The mistake is treating every photo as a studio project or expecting one preset to solve several different problems. Start with the controls the job requires and a clear idea of what an acceptable result looks like.
Start with the asset's intended use
Before uploading, name the destination. “For social” is too broad to guide an edit. Is this a cover image where the subject needs to read at a small size? A product listing where accurate color matters? A team photo for a proposal where natural skin tones and a professional crop matter more than dramatic styling?
That answer sets your tolerance for change. A casual behind-the-scenes post may need only modest cleanup. Give a paid campaign image a closer review because it will represent the offer repeatedly. A client-facing image for a proposal or SOP may need a conservative treatment that feels credible rather than heavily processed.
The same principle applies outside photo work. A creator may use the finished visual in a campaign concept, while a consultant may prepare a headshot for a profile before drafting a business document. Each tool handles a different stage. Keep image editing focused on the image itself.
When a quick fix is enough
Open Quick Photo Fix when you can describe the issue in one sentence and the photo is already fundamentally sound. For example: “This image is good, but it needs a cleaner presentation before I post it.”
Upload the highest-quality source file you have. Then pick the available preset or correction that best addresses the most visible issue. Avoid stacking changes simply because the options are there. Keep the original available so you can judge whether each change serves the intended use.
Use the local preview to check your setup before paid processing. Once the completed result is available, check the subject, background, edges, and any text or logos in the frame. If the photo includes a product, compare its color against the original or against the real item under normal light. If it includes a person, inspect skin tone, hair edges, and facial details. A result is useful only if it still represents the person or product accurately.
For a one-off social post, event photo, or casual creator image, decide whether modest cleanup meets the brief. If the completed output is suitable, finish there. A second editing stage should have a specific purpose.
New tool example
Quick Clean Up: review the texture, keep the framing
This backpack image was generated specifically for this article in MikeSullyTools AI Image Generator. It is an illustrative product image, not a customer photograph. We uploaded the original to Quick Photo Fix, selected Clean Up, processed it, and downloaded the completed result.
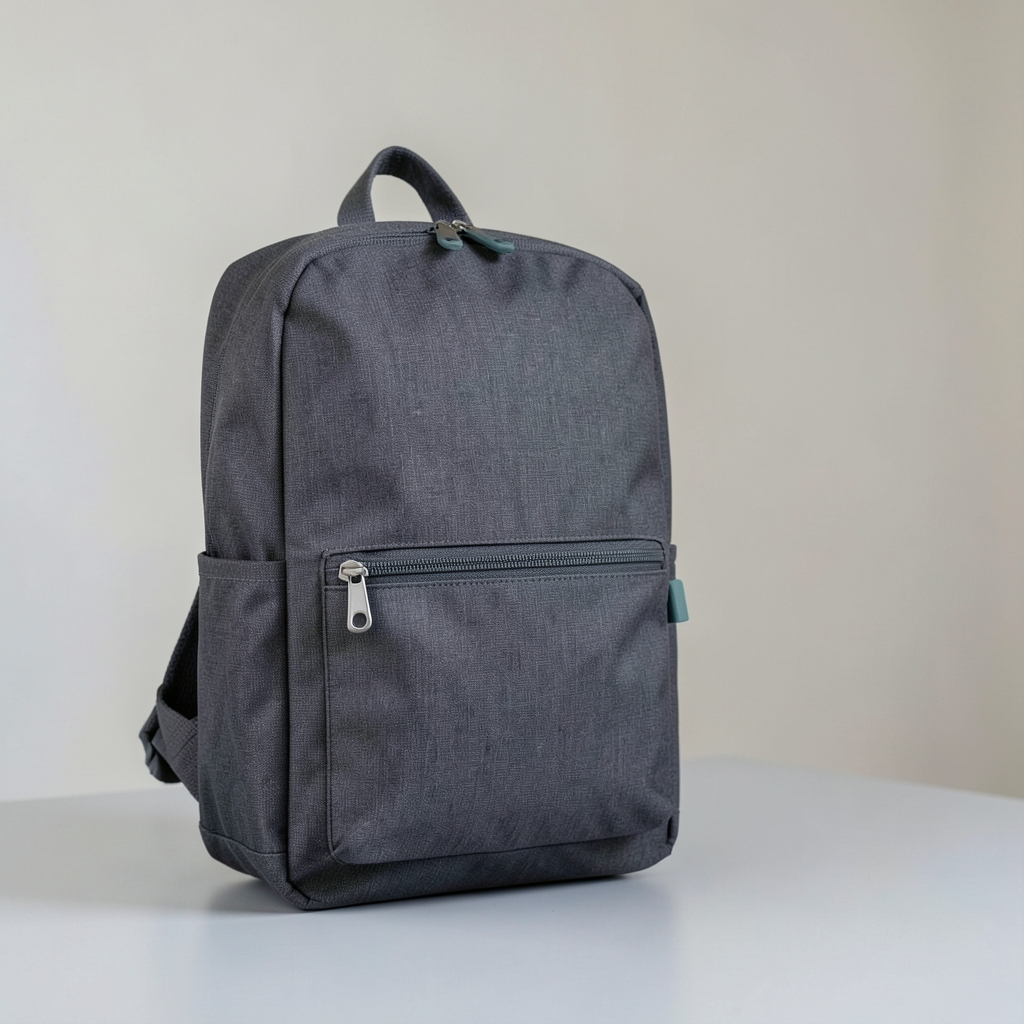
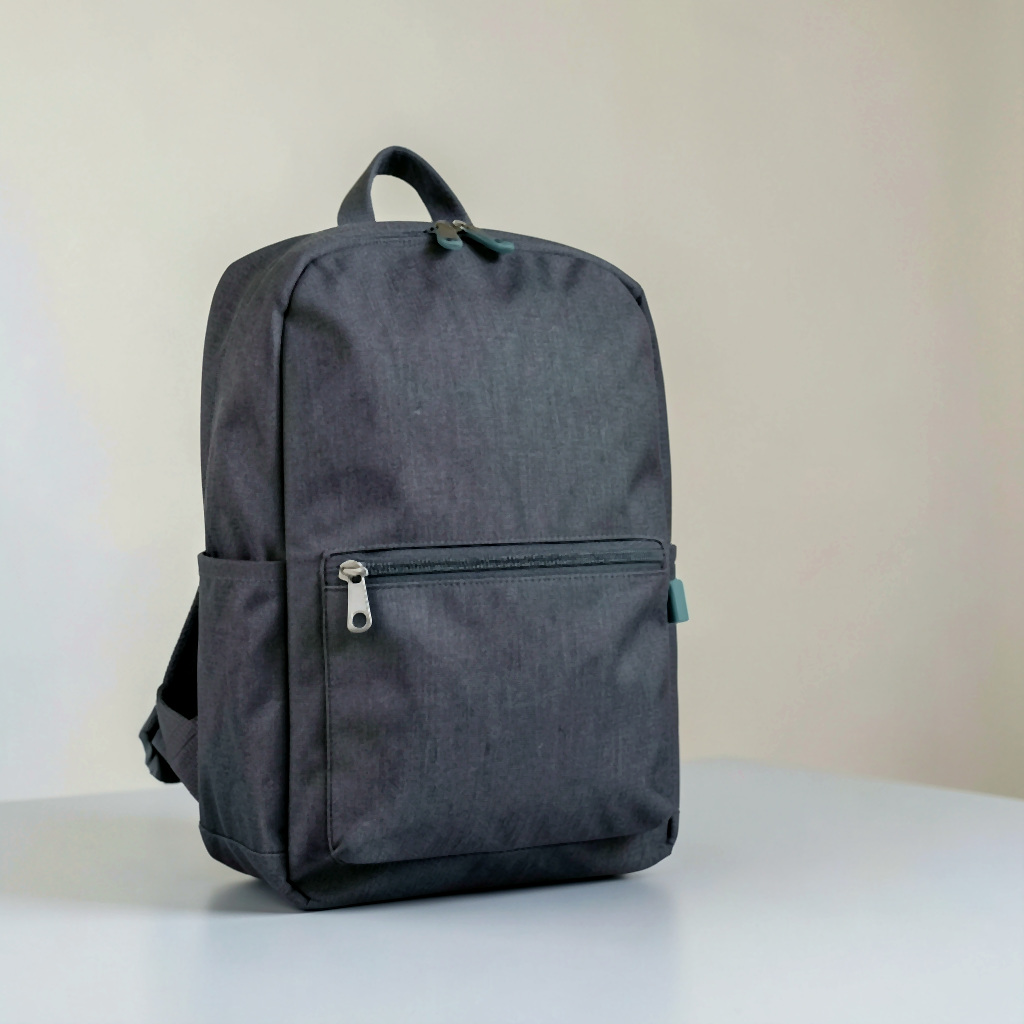
What to compare: The full composition stays the same. In this export, cleanup softens some of the fine fabric and zipper detail. Inspect the weave, seams, and edges before choosing the version that suits your use. If preserving fine texture matters most, the original may be the better choice.
Actual exported files from November 8, 2026. Both images are shown in full, without an extra display crop. These observations apply to this example.
Signs you should move to studio controls
Choose AI Photo Studio when the job needs additional framing, adjustment, or inspection controls. You can start there directly if that requirement is already clear.
Studio provides exposure, highlights, and shadows controls, as well as crop, rotate, flip, and straighten options. Its Before, After, Split, and Side views support closer inspection of the source and processed result. Use the Photo Studio guide for individual controls, following the current workspace labels where a dated screenshot differs. [2][3]
A studio workflow is useful when the photo has competing issues. A tighter crop may strengthen the composition but remove a detail the viewer needs. A brighter result may improve visibility but weaken the mood of the campaign. Those are decisions to review against the brief.
Consistency also matters across several assets. If a small business is preparing a set of product images, review the finished exports together. Do the backgrounds feel related? Does the product remain recognizable? Are the crops consistent enough that the grid or catalog looks intentional?
More control calls for deliberate review. Correct the largest issue, inspect the change, and decide whether another adjustment is necessary. Adobe's sharpening guidance recommends checking at 100% and explains that stronger sharpening increases edge contrast. Also look at the image at its intended display size; inspect edges and textures for an unnatural finish. [5]
New tool example
Studio crop: make the framing decision visible
We also uploaded the same original directly to AI Photo Studio, applied a tighter manual crop, and processed it using Clean Up, Web 1024px, and enhancement strength 84. This is a separate run from the original source; the Quick export was not used as its input.
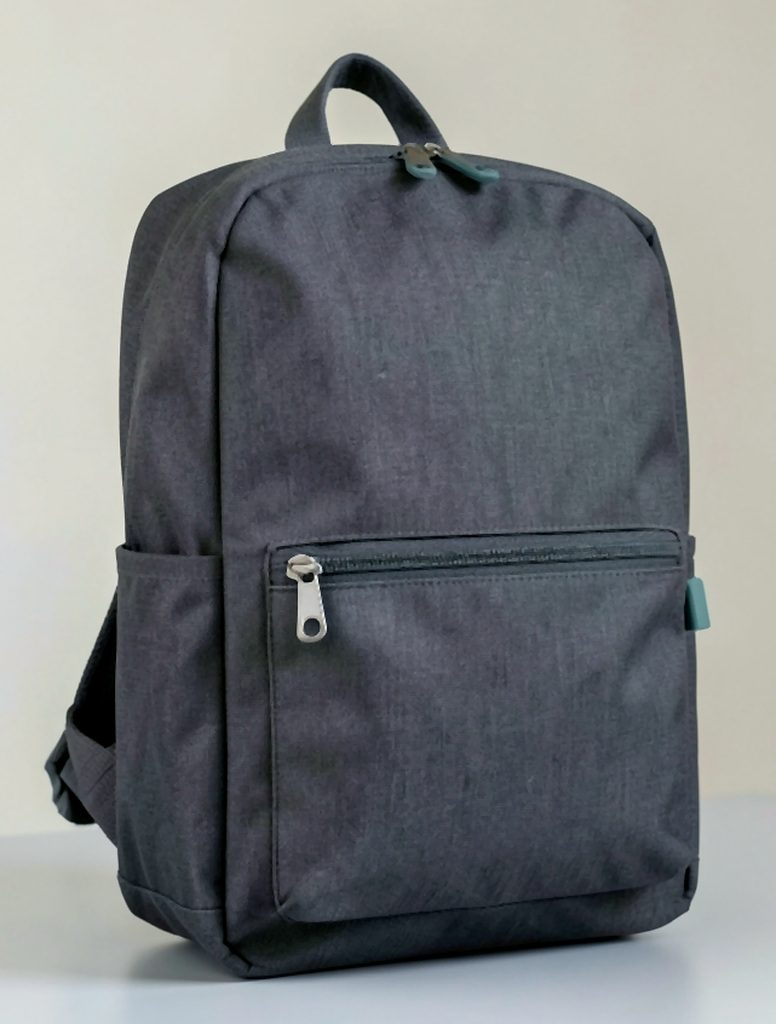
What to compare: The portrait crop removes some surrounding space, so the backpack fills more of the frame. Its top handle and lower corners remain visible. This demonstrates Studio’s framing controls. The larger subject does not establish recovered detail or greater sharpness; processing also changes the fabric texture.
The original is square; the exported crop is 776 × 1024. Both complete images are fitted into equal display areas. Strength 84 is the setting used for this run, not a quality score.
A practical two-pass workflow
Treat this as two stages of decision-making, not a requirement to buy two processing runs. First decide which workspace has the controls needed. Then review the completed result against its intended use.
First pass: choose and prepare. Save the original file and use an editing copy. Name the main problem and the destination. Choose Quick Photo Fix for a contained adjustment, or start directly in Studio when you already need its additional controls. Review the local preview, settings, and relevant credit balance before starting a paid job.
Second pass: inspect the output. Compare the completed result with the original at a useful detail view and at normal viewing size. If it meets the brief, download it. If it does not, write down what still feels off before another attempt. That note might be as simple as “the item blends into the background” or “the crop leaves too much empty space.”
If you decide to make another processing run, check its cost first. Switching workspaces does not transfer credits between their separate balances. Keep the original available as a starting point; repeatedly processing an already processed export is not a required workflow. [4]
Review the image where it will be seen whenever possible: in the draft post, campaign layout, presentation, or document. Check whether a mobile crop hides important detail or whether the image still works beside the surrounding text.
Before approving the file, confirm that names, signs, labels, product details, and other meaningful visual information still look correct. Treat a processed result as something to inspect, not proof that every detail is accurate. Use images you have permission to edit and follow the relevant client expectations when handling sensitive work.
Keep review separate from publishing
Exporting an image is not the same as approving it for public use. Give the finished file a clear name that identifies the project and version, then place it in the workflow where it belongs. A creator might use it in a social draft. A marketer might add it to a campaign concept. A freelancer might place it into a proposal after checking how it reads beside the text.
That separation gives you another opportunity to check the asset in context. It also makes it easier to return to the source if a teammate, client, or customer notices a mismatch. If an image supports a paid ad, a product claim, or an important business document, obtain the appropriate approval before it goes live or gets sent.
Choose speed on purpose, not by habit
Quick fixes are a practical choice when the source is solid and the need is simple. Studio controls earn their place when a particular adjustment, framing decision, or closer review helps meet the brief.
Start with Quick Photo Fix for a contained cleanup task, or AI Photo Studio for more detailed control. Check the processing cost, review the completed result, and download it when it is accurate, clear, and fit for its destination.
Sources and further help
Product descriptions and signed-in preset labels checked November 8, 2026. The backpack source was newly generated in MikeSullyTools AI Image Generator for this article. The comparisons show actual Quick Photo Fix Clean Up and AI Photo Studio Clean Up exports made that day, each from the same original. The Studio example includes a manual crop at enhancement strength 84. Results are specific to these runs; the opening scenario is illustrative and no processing time is promised.
- Quick Photo Fix: current presets, adjustments, social sizing, and processing notice
- AI Photo Studio: current adjustment, framing, and comparison controls
- AI Photo Studio guide: local preview, processing, and export
- Fix Blurry Images Online: separate credit balances and paid processing
- Adobe: Smart Sharpen controls and viewing at 100%