MikeSullyTools
Photo Editing Station Guide

Advanced Photo Editing Station Guide

Use the current station layout map to find the live photo workspace sections, then open the matching guide section for preview stage, output size, cached preview before job, file rows, preset tabs, pricing, and export flow.

Current layout Section picker Empty-state workspace Pricing cards
Current station reference Use the linked callouts as the page map: each label points to a visible area in the current Photo Editing Station empty-state layout and opens the matching guide section below.
Updated May 28, 2026
Ready for the step-by-step guide? Jump to the section list and open the part you need. Jump to guide sections

Jump to a section

Use these shortcuts to show one part of the guide at a time. The active photo section opens below while the rest of the workflow stays tucked away.

Preview Stage, Output Target, Cached Preview, File Rows, and Upload

The current station starts from the large preview stage, output size row, cached preview before job strip, original and output file rows, Upload Image, Clear Image, Compare Before, and Export Processed Image. Pick the output target before tuning deeper settings.

Start Here
Photo Editing Station start flow with output size, cached preview before job strip, original file row, output file row, Enhance Image, Clear Image, Compare Before, and Export Processed Image controls
Focused start controls: choose output size, confirm the cached preview chips, check the original and output file rows, then use the action buttons when the loaded photo is ready.

Visible Start Flow

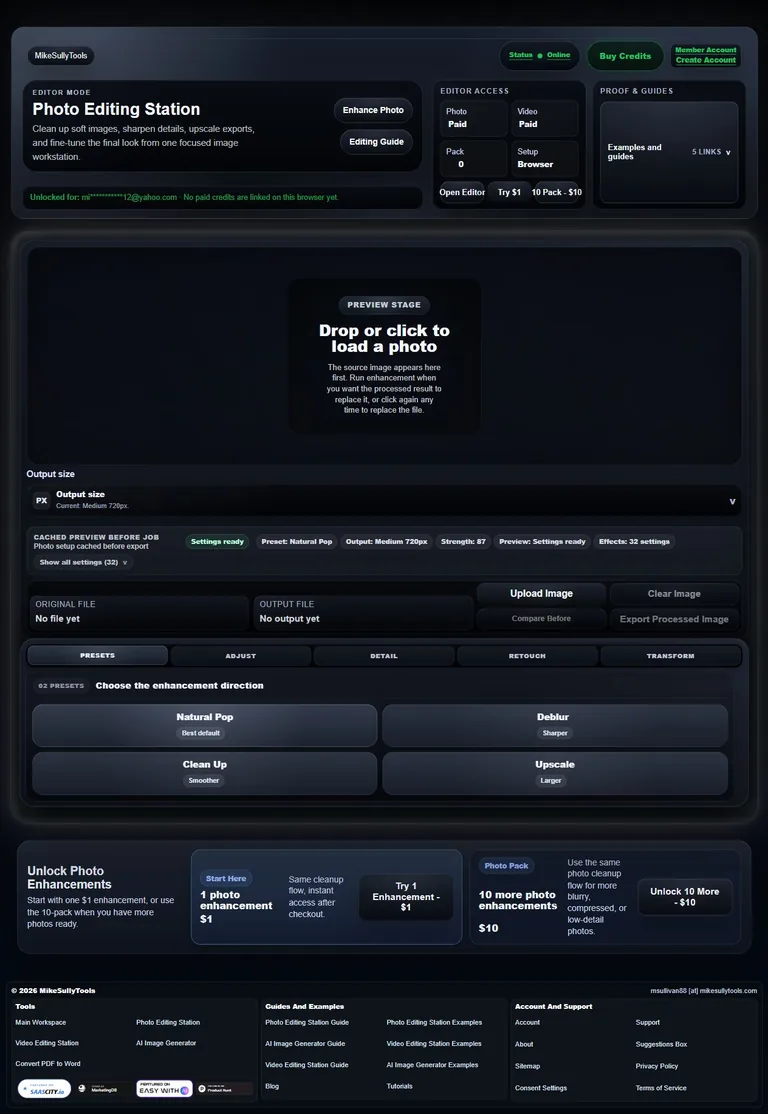
  • Load a photo from the upload area or by dropping it onto the preview stage.
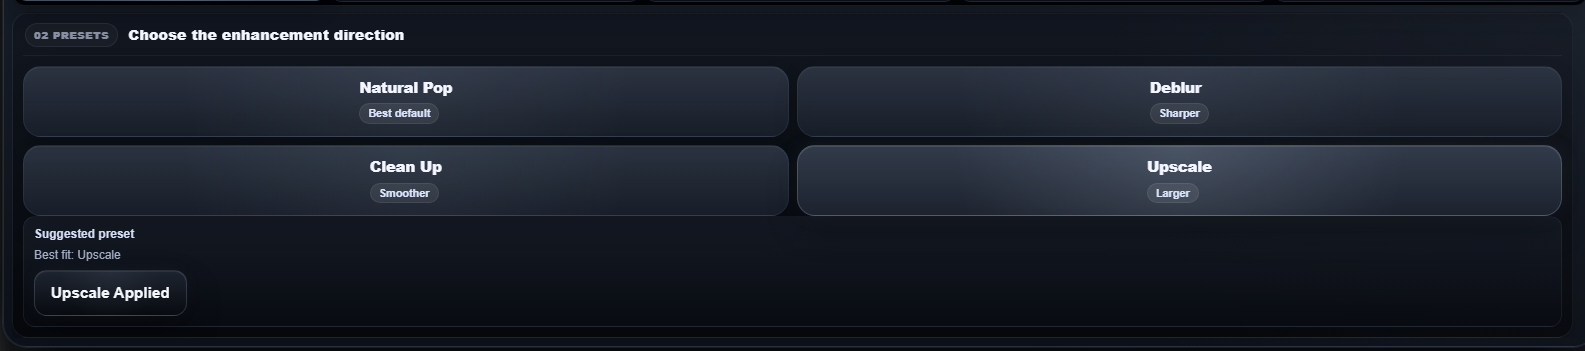
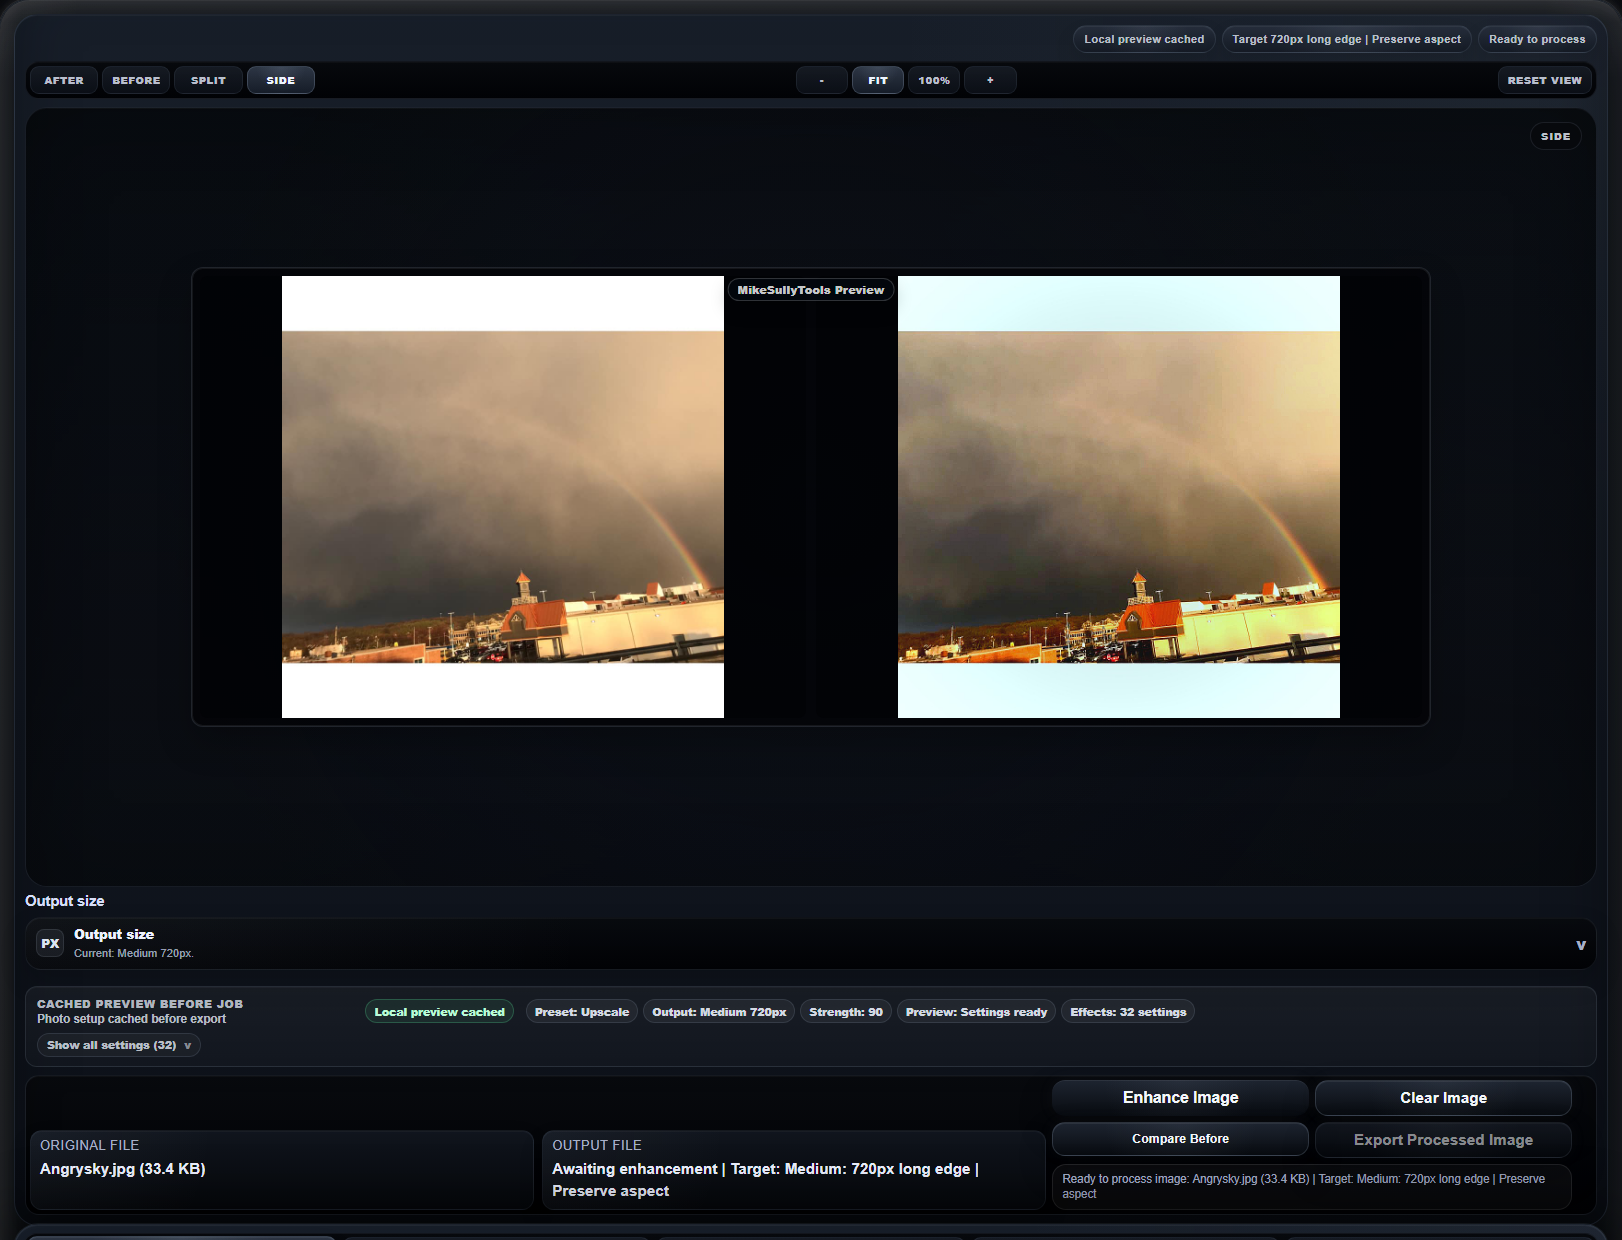
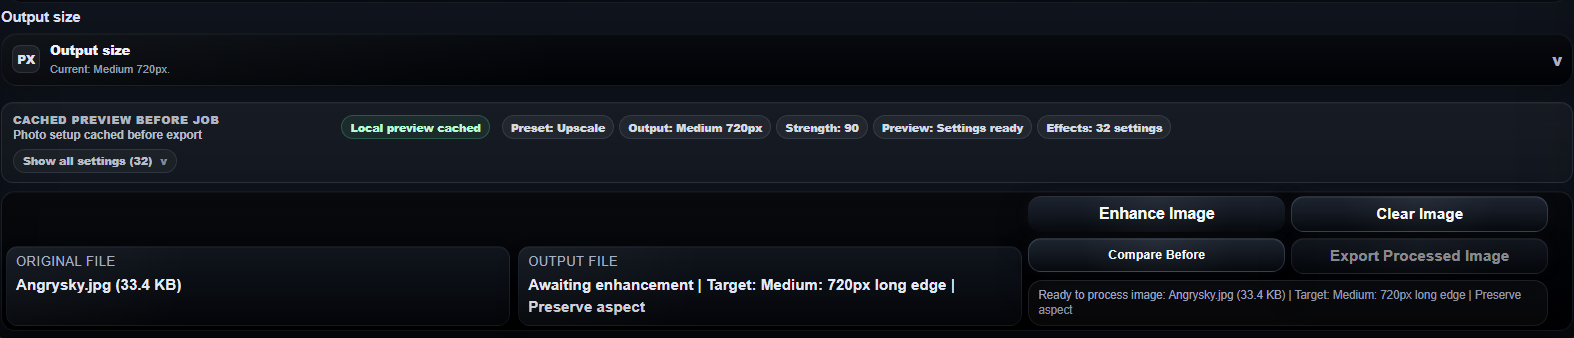
  • Choose Thumbnail, Small, Medium, Web, HD, 4K, or a social target before enhancement.
  • Confirm the original file row, output target, preserve-aspect note, and ready status.
  • Use Clear Image when the wrong file or target is loaded.

Output Target Meanings

  • Medium 720px is the quick preview default.
  • Web 1024px is the safest routine site export.
  • HD and 4K are for larger delivery when the source can support it.
  • Instagram, Facebook, X, LinkedIn, YouTube, Story, Reel, and TikTok targets lock the frame for platform use.

File Rows

The original row identifies the loaded source. The output row starts as awaiting enhancement, then changes to the processed filename, applied target, aspect behavior, and export format when the result is ready.

Presets, Tabbed Controls, and Cached Preview Chips

Presets set the broad photo treatment in the current tabbed control panel. The cached preview before job strip summarizes the setup before Upload Image or export actions are used.

Preset First
Photo Editing Station Presets tab with Natural Pop, Deblur, Clean Up, Upscale, and suggested preset card
Use Natural Pop, Deblur, Clean Up, or Upscale as the first decision before opening the deeper control tabs.
Photo Editing Station cached preview chips showing local preview cached, preset, output, strength, preview state, and effect count
Cached preview chips summarize preset, output target, strength, preview readiness, and the full effect count before a credit is used.

Preset Choices

  • Natural Pop is the balanced default for ordinary images that need cleaner contrast and detail.
  • Deblur is for visibly soft or handheld-blurred sources.
  • Clean Up is for noisy, compressed, or rough images that need smoother texture.
  • Upscale is for files where the output target needs more pixels than the source comfortably provides.

Suggested Preset

The fit suggestion reads the local photo before processing. It stays editable: apply it when it matches the job, or choose another preset when your final use case matters more than the automatic signal.

Cached Preview Chips

Check settings ready, preset, output target, strength, preview readiness, and effect count before processing. Open the full settings list when you need to audit every adjustment being sent.

Credit-Safe Workflow

Use the browser preview and cached preview chips first. Enhance Image should come after the output target, preset, adjustment tabs, and frame behavior are already correct.

Current Tabbed Control Layout

Adjust, Detail, Retouch, and Transform now live in the same lower station panel as Presets. Keep the preview stage visible above while moving between the control tabs.

Core Options
Photo Editing Station Adjust tab with exposure, highlights, shadows, vibrance, tint, white balance, auto levels, vignette correction, lighting recovery, skin tone protection, color noise reduction, banding reduction, color fringe correction, and dehaze controls
Adjust handles global photo corrections: tone, color, white balance, lighting recovery, vignette correction, and artifact-safe cleanup.
Photo Editing Station Detail tab with export format, enhancement strength, finish studio controls, cleanup, sharpening, deblur, detail preserve, compression cleanup, upscale strength, brightness, contrast, color richness, and warmth
Detail controls format, enhancement strength, finish studio depth, cleanup, sharpening, upscale strength, and final tone.

Light And Color

  • Use exposure, highlights, shadows, vibrance, and tint for small visible corrections.
  • Use white balance and auto levels when the file has a clear color cast or weak tonal range.
  • Use lighting recovery and vignette correction for dark foregrounds, bright skies, and lens-shaded corners.

Cleanup Signals

Color noise reduction, banding reduction, color fringe correction, and dehaze / clarity help with speckles, sky gradients, edge halos, haze, and flat contrast without turning every job into a heavy sharpen pass.

Finish Studio

Use Smart finish only for routine jobs. Open cleanup, tone, or full finish controls only when the cached preview still needs a targeted correction.

Export Format

JPEG is the normal browser-ready export. PNG is better when transparency or clean graphics matter. WEBP is useful when smaller file size matters and the destination supports it.

Subject Cleanup, Background Control, Frame Behavior, and Lens Correction

Retouch stays focused on subjects and backgrounds. Transform controls how the photo fits the selected target frame, plus rotation, flips, straighten, and lens / perspective correction.

Finish Frame
Photo Editing Station Retouch tab with face retouch, skin smoothing, object cleanup, background mode, and background blur controls
Retouch is for subject and background work only: face retouch, skin smoothing, object cleanup, background mode, and blur.
Photo Editing Station Transform tab with frame behavior, rotate and flip buttons, straighten, lens perspective correction, and reset transform controls
Transform controls the output frame, rotation, flips, straightening, lens / perspective correction, and reset behavior.

Retouch

Use face retouch, skin smoothing, object cleanup, background mode, and background blur only when the image content actually needs subject or background work.

Frame Behavior

Fit full image is safest. Fill selected size and Center crop are useful when a platform frame matters more than preserving every edge of the original photo.

Lens / Perspective

Use wide-angle correction for phone lens bend, vertical perspective straighten for tilted buildings or interiors, and combined correction only when both problems are visible.

Orientation

Rotate, flip, and straighten should solve source orientation or horizon problems. They are preview and request controls, not replacement steps for choosing the right output size.

Preview Stage, Before, After, Split, Side, Zoom, and Reset View

The current empty-state preview area confirms where the loaded file will appear, then keeps comparison controls close to the image after processing. Use the comparison controls before export so the final job starts from a visible setup.

Review First
Photo Editing Station side-by-side preview with the original image and cached browser preview
Side mode shows the source and browser-preview result together. Fit, 100%, zoom in, zoom out, and Reset View are inspection controls only.

Comparison Modes

After shows the current preview result, Before shows the source, Split overlays the comparison in one frame, and Side separates the two views for easier inspection.

Zoom Controls

Use Fit for layout review, 100% for detail inspection, plus and minus for smaller checks, and Reset View when panning or zooming gets in the way.

Browser Preview

The cached browser preview is an approximation of the final job, but it should clearly show output shape, tone direction, crop behavior, and major setup choices.

Status Pills

Watch Local preview cached, Target size, Preserve aspect, Ready to process, and output-ready states. They are the fastest way to catch a mismatched target or unfinished setup.

Completed Result, Compare Toggle, Pricing, and Exported File

Each Enhance Image run uses an available photo credit or paid pack credit. The current guide reference also shows the photo pricing panel that appears below the station when more enhancements are needed.

Export
Photo Editing Station file rows and action buttons used before enhancement and export
The file rows and action buttons show whether the photo is ready to process, compare, clear, or export.
Photo Editing Station cached preview chips to confirm before using a photo enhancement credit
Confirm cached preview chips before using a photo enhancement credit.
FreeInitial creditsUse free photo credits for small proof runs before buying a pack.
PackPaid photo creditsPaid pack credits restore processing capacity for more station exports.
CompareCheck before exportUse Compare Before after the processed result appears to confirm the change.
ExportDownload final resultExport Processed Image should point to the completed output, not the local source preview.

Recommended Starting Points

Use these as safe first passes, then confirm the browser preview and cached preview chips before processing.

Recipes
Photo Editing Station Presets tab used for recommended photo starting points
Start from the preset panel, then refine output size and deeper controls only where the preview needs it.

Everyday Web Photo

Medium or Web target, Natural Pop, JPEG, white balance auto, soft auto levels, light dehaze / clarity, and no retouch unless the subject needs it.

Soft Or Slightly Blurry Photo

Deblur, Medium or HD target, light cleanup, medium sharpening only if the preview still looks soft, and detail preserve high enough to avoid crunchy texture.

Noisy Or Compressed Source

Clean Up, JPEG or PNG depending on content, medium color noise reduction, light banding reduction, and only mild sharpening after cleanup.

Large Export

Upscale, choose HD or 4K first, keep preserve aspect unless a platform frame is required, then inspect Side mode before processing.

Architecture Or Room Photo

Natural Pop or Clean Up, balanced lighting recovery, white balance auto, vignette correction if corners are dark, and lens / perspective correction only when lines bend or lean.

Frequently Asked Questions

These answers match the current Photo Editing Station controls shown above.

FAQ
Photo Editing Station Adjust tab referenced by the FAQ answers
Most workflow questions come down to preset, output target, cached preview chips, then the focused Adjust or Detail controls.

Which preset should I start with?

Start with the suggested preset when it matches the job. Otherwise use Natural Pop for normal cleanup, Deblur for softness, Clean Up for noisy files, and Upscale for larger exports.

What changed in Adjust?

Adjust now includes white balance, auto levels, vignette correction, lighting recovery, skin tone protection, color noise reduction, banding reduction, color fringe correction, and dehaze / clarity.

When should I open full finish studio?

Open it only when Smart finish is not enough. It exposes cleanup, sharpening, deblur, detail preserve, compression cleanup, upscale strength, brightness, contrast, color richness, and warmth.

How should I choose output size?

Medium or Web is safest for routine work. Use HD, 4K, or a social size only when the destination needs that frame or the final file must be larger.

When should I use lens correction?

Use it for visible phone-lens bend, tilted vertical lines, architecture, interiors, product tables, or room photos. Leave it off for ordinary portraits and landscapes unless lines look wrong.

When should I click Enhance Image?

After the output target, preset, cached preview chips, Adjust, Detail, Retouch, and Transform settings are correct. The completed output row becomes the export source.